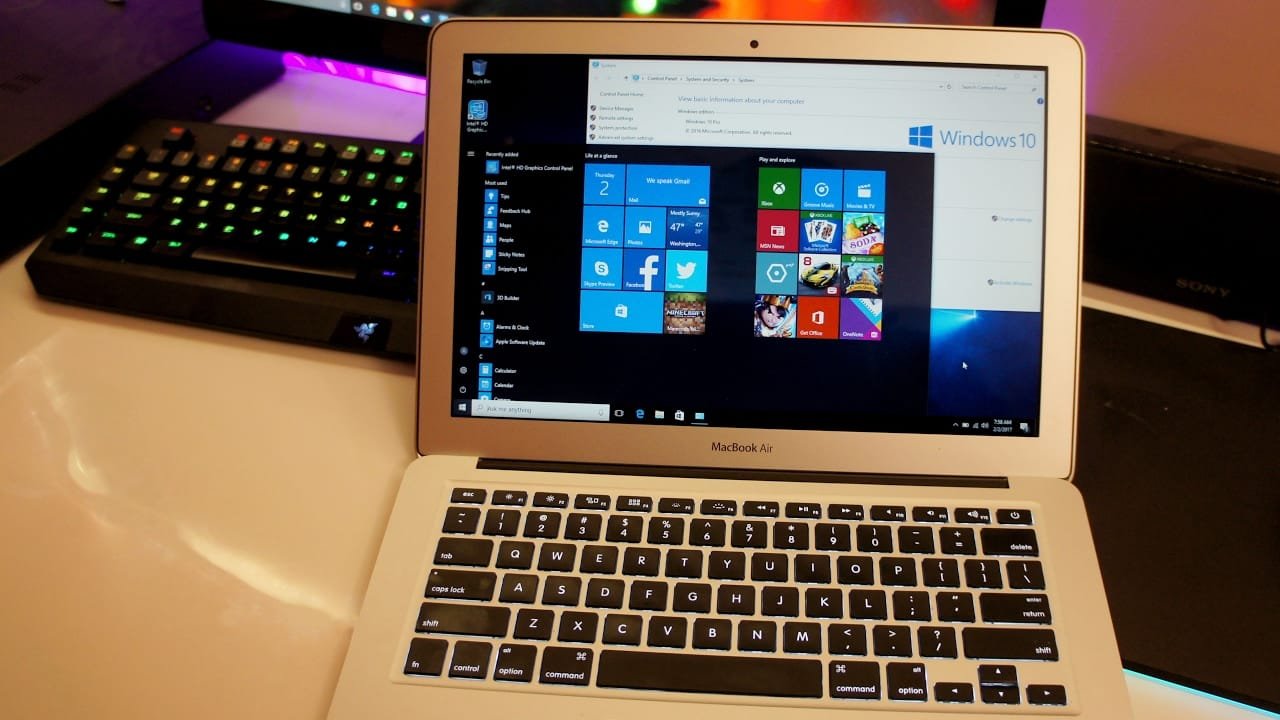
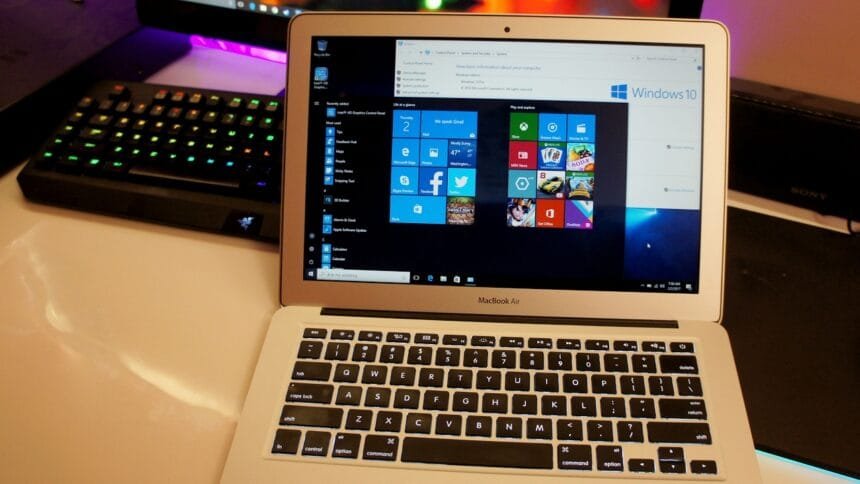
If you own a Mac and want to run Windows alongside macOS, Boot Camp is the perfect solution. It allows you to install Windows 10 on your Mac, letting you switch between macOS and Windows as needed. Whether you’re a gamer, a developer, or need Windows-specific software, Boot Camp gives you the flexibility to use both operating systems on one machine.
In this comprehensive guide, we’ll walk you through everything you need to know about BootCamp for Mac with Windows 10, including how to set it up, the benefits, and things to keep in mind when using Boot Camp.

What is Boot Camp for Mac?
Boot Camp is a built-in utility on Mac computers that allows you to install and run Windows on your Mac alongside macOS. With Boot Camp, you can create a separate partition on your Mac’s hard drive, which will be dedicated to Windows. This gives you the ability to run Windows natively on your Mac, without the need for virtual machines or other complicated solutions.
When you use Boot Camp, you can reboot your Mac and choose whether you want to use macOS or Windows 10 as your operating system. This is ideal if you need to use software or applications that are only available on Windows but still want to keep your Mac’s native performance for daily tasks.
Why Use BootCamp for Mac with Windows 10?
There are several reasons why you might want to use Boot Camp for Mac with Windows 10:
1. Access to Windows-Only Software
Many businesses and professionals rely on Windows-specific software that isn’t available on macOS. For example, certain gaming programs, design tools, or accounting software might only be compatible with Windows. Boot Camp allows you to run these programs on your Mac without the need for a second computer.
2. Gaming
If you’re a gamer, you know that many PC games are not available on macOS. Windows 10 supports a much broader range of games than macOS, so using Boot Camp to run Windows allows you to play games that aren’t supported natively on Mac.
3. Performance
Unlike running Windows through a virtual machine, Boot Camp runs Windows natively, which means better performance. Your Mac’s hardware, including the CPU, RAM, and GPU, is used at full capacity, making it perfect for resource-intensive tasks like gaming, 3D modeling, or video editing.
4. Dual Operating System
With Boot Camp, you get the best of both worlds. You can switch between macOS and Windows 10 at startup, depending on which operating system you need to use. This flexibility is perfect for users who need to work in both environments.
Read More: Switcher Studio for Mac
How to Install Windows 10 on a Mac Using Boot Camp
To install Windows 10 on a Mac using Boot Camp, follow these steps. Boot Camp allows you to run both macOS and Windows on the same machine, giving you the ability to switch between the two at startup.
Prerequisites:
- A Mac with an Intel processor (Boot Camp doesn’t support Apple Silicon Macs like the M1 or M2 chips).
- A Windows 10 ISO file.
- A USB drive (at least 8GB of storage) to create a bootable USB for Windows installation.
- A backup of your important data in case something goes wrong during the installation.
Step-by-Step Guide:
1. Prepare Your Mac
- Update macOS: Ensure your macOS is up-to-date. Check for updates by going to Apple menu > System Preferences > Software Update.
- Free up storage: Ensure that your Mac has enough free space for the Windows installation (at least 64GB, ideally 128GB or more).
2. Download Windows 10 ISO
- Go to the Microsoft website to download the Windows 10 ISO file: Microsoft Download Windows 10.
- Select your language and edition, then download the 64-bit version.
3. Open Boot Camp Assistant
- On your Mac, open Boot Camp Assistant. You can find it in Applications > Utilities.
- Boot Camp Assistant will guide you through the process of installing Windows 10.
4. Create a Partition for Windows
- Launch Boot Camp Assistant and click Continue.
- You’ll need to choose the Windows 10 ISO file that you downloaded earlier. Boot Camp will automatically recognize the ISO.
- Partition size: Choose the amount of storage space you want to allocate to Windows. It’s recommended to allocate at least 64GB for a smooth experience.
- Click Install when you’re ready.
5. Install Windows
- Boot Camp Assistant will now create a bootable USB drive and partition your hard drive for Windows installation. This process may take some time.
- Once completed, your Mac will restart, and the Windows 10 installer will begin.
- Follow the on-screen instructions to install Windows 10.
- Select the partition named “BOOTCAMP” when prompted to choose where to install Windows. Make sure to format this partition if asked (don’t select any other partition).
- Windows will begin installing. The process may take some time, and your Mac may restart multiple times during the installation.
6. Set Up Windows 10
- After the installation, your Mac will boot into Windows. You’ll need to go through the Windows setup process, which includes selecting your language, region, and user settings.
- Once the setup is complete, you can log into Windows and start using it.
7. Install Boot Camp Drivers
- When you first boot into Windows, you might notice that things like the trackpad, keyboard, or Wi-Fi don’t work properly. To fix this, you need to install the Boot Camp drivers.
- The Boot Camp Assistant should automatically prompt you to install the necessary drivers. If it doesn’t, you can manually install them:
- Open File Explorer in Windows.
- Look for the Boot Camp folder on your USB drive.
- Open the folder and run the Setup.exe file to install the Boot Camp drivers.
8. Restart Your Mac
- Once the drivers are installed, your Mac will be able to use all its hardware correctly within Windows. You may need to restart your Mac after installing the drivers.
9. Switch Between macOS and Windows
- To switch between macOS and Windows, restart your Mac and hold the Option (⌥) key as soon as it starts booting.
- You will be able to select either macOS or Windows from the boot menu.
Troubleshooting Tips:
- Partition size: If you encounter issues with the partition size, try allocating more space to Windows or adjusting your existing partition.
- USB drive issues: If the USB drive is not recognized or not working, make sure it’s formatted as MS-DOS (FAT) before starting the installation.
- Windows driver issues: If Boot Camp drivers aren’t installing correctly, try manually downloading the latest Boot Camp drivers from the Apple website.
With Boot Camp, you can easily switch between macOS and Windows on your Mac. However, note that Boot Camp is only available for Intel-based Macs. If you’re using an Apple Silicon Mac (M1, M2, etc.), you will need to use virtualization software like Parallels Desktop or VMware Fusion instead.
Common Installation Problems with Boot Camp on Mac and Their Solutions
If you’re encountering installation problems while installing Windows 10 using Boot Camp on your Mac, here are some common issues and their solutions:
1. Boot Camp Assistant Won’t Open
- Solution: Ensure your macOS is up to date. If Boot Camp Assistant still won’t open, try restarting your Mac or resetting the NVRAM (hold Option + Command + P + R during startup) and then try again.
2. Windows 10 ISO Not Recognized
- Solution: Ensure the ISO file is downloaded from the official Microsoft website and is the correct 64-bit version. Re-download the ISO if necessary. Also, ensure that the ISO is not corrupted.
- Make sure that the ISO file is stored in an easily accessible location, like your Desktop.
3. Boot Camp Assistant Freezes or Fails During Partitioning
- Solution:
- Disk space: Make sure there is enough free space on your Mac’s hard drive for the partition. At least 64GB is recommended for the Windows partition.
- Disk repair: Open Disk Utility and run First Aid on your main drive to check for any disk issues before proceeding with the partition.
- Try creating a smaller partition: Sometimes, reducing the size of the partition (e.g., creating a 50GB partition for Windows) can help.
4. The Bootable USB Drive Doesn’t Appear
- Solution:
- Make sure the USB drive is properly formatted as MS-DOS (FAT) in Disk Utility.
- Try using a different USB drive if possible.
- Make sure that the USB is plugged into a working port on your Mac.
5. Windows Installation Fails to Boot
- Solution: If the installation fails to boot after restarting, hold the Option (⌥) key during startup to manually select the Windows partition or USB drive.
- If you don’t see the USB drive or Windows option, try creating the bootable USB again with Boot Camp Assistant or use a third-party tool like Rufus to create the bootable drive from Windows.
6. Windows Won’t Install on Boot Camp Partition
- Solution:
- When the installer asks where to install, choose the BOOTCAMP partition and format it. Do not choose any other partition, as this could cause data loss.
- If there are errors, try deleting the partition and creating a new one from the Windows setup screen.
7. Windows Setup Freezes
- Solution:
- Ensure the Windows 10 ISO is up-to-date. If the ISO is outdated, try downloading the latest version from Microsoft.
- Disconnect any unnecessary peripherals from your Mac during the installation process (like external hard drives or printers) to avoid conflicts.
8. Boot Camp Drivers Not Installing Correctly
- Solution:
- After installing Windows, if hardware components like the trackpad, sound, or Wi-Fi aren’t working, navigate to the Boot Camp USB drive in Windows and manually install the drivers by running setup.exe.
- If the drivers aren’t found on the USB, visit the Apple Support website to download the latest Boot Camp Support Software and install it manually.
9. No Option to Boot into Windows
- Solution:
- Restart your Mac and hold the Option (⌥) key during boot. This should bring up the boot manager, where you can select Windows or macOS.
- If it still doesn’t show up, try using Boot Camp Control Panel in Windows to set the default operating system.
10. macOS Cannot Be Booted After Installing Windows
- Solution: If macOS won’t boot after installing Windows, use Recovery Mode to repair macOS:
- Shut down your Mac.
- Press Command + R during startup to enter macOS Recovery.
- Use Disk Utility to repair your macOS disk and restore macOS if necessary.
11. “No Bootable Device Found”
- Solution:
- This can happen if the Windows installation didn’t finish properly. Reboot your Mac, hold Option (⌥), and select the macOS partition to boot into macOS.
- You may need to restart the installation process or use macOS Recovery to restore your system.
If you’re still experiencing issues after following these solutions, it could be helpful to check Apple’s support page for Boot Camp or consult specific community forums for additional troubleshooting.
Switching Between macOS and Windows
Switching between macOS and Windows can be done in various ways, depending on your needs, whether you prefer to run both operating systems simultaneously or switch between them when needed. Below are some common methods:
1. Using Boot Camp (Dual Boot)
- Boot Camp allows you to install Windows on a separate partition of your Mac’s hard drive, enabling you to choose between macOS and Windows when you start up your Mac.
- Steps to Set Up:
- Open Boot Camp Assistant (found in Applications > Utilities).
- Follow the on-screen instructions to download the necessary Windows drivers and create a partition for Windows.
- Insert a Windows installation USB drive (or use an ISO file).
- Restart your Mac and hold the Option key during startup to choose between macOS and Windows.
- Pros: Native performance for both operating systems.
- Cons: You can only run one OS at a time, and you need to reboot to switch between them.
2. Using Virtualization Software
- Virtualization software lets you run Windows within macOS, so you can use both operating systems at the same time without needing to reboot. This method is great for running Windows applications alongside macOS programs.
- Popular Virtualization Options:
- Parallels Desktop: A user-friendly solution that integrates well with macOS and provides good performance for most Windows applications.
- VMware Fusion: Another popular option that lets you run Windows alongside macOS with excellent compatibility.
- VirtualBox: A free, open-source alternative, though it may not offer the same level of integration or performance as paid options.
- Steps to Set Up:
- Download and install your chosen virtualization software (e.g., Parallels, VMware, or VirtualBox).
- Create a new virtual machine (VM) and follow the prompts to install Windows (either from an ISO file or a physical disk).
- Once set up, you can run Windows in a window or full-screen on your Mac, while also using macOS.
- Pros: You can run both operating systems simultaneously.
- Cons: Requires more system resources (RAM, CPU) and may not provide the same performance as running Windows natively.
3. Using Remote Desktop Access
- If you have a Windows machine available (either on your local network or remotely), you can use Remote Desktop to access it from your Mac.
- Steps to Set Up:
- On your Windows PC, enable Remote Desktop (Settings > System > Remote Desktop).
- Install a Remote Desktop client on your Mac, such as the Microsoft Remote Desktop app from the Mac App Store.
- Use the app to connect to your Windows machine, and you can control it from within macOS.
- Pros: Access your Windows system from anywhere and from within macOS without installing Windows on your Mac.
- Cons: Dependent on network connection and may experience latency or performance issues.
4. Using CrossOver for Windows Applications
- CrossOver is a program that lets you run Windows applications directly on macOS without needing a full Windows installation.
- Steps to Set Up:
- Download and install CrossOver.
- Use it to install Windows programs and run them natively on your Mac.
- Pros: No need to install Windows; runs specific applications.
- Cons: Limited to certain Windows apps and may not support all Windows programs.
5. Using Cloud-Based Windows
- Cloud services such as Microsoft Azure Virtual Machines or Amazon WorkSpaces allow you to run a full Windows desktop in the cloud, which can be accessed from your Mac using any browser or remote desktop application.
- Steps to Set Up:
- Sign up for a cloud service (like Microsoft Azure or Amazon WorkSpaces).
- Create a virtual Windows machine in the cloud.
- Use the cloud service’s client app or a browser to access the Windows desktop from your Mac.
- Pros: Access Windows anywhere with an internet connection.
- Cons: Requires an internet connection and may incur additional costs for cloud usage.
6. Switching Between macOS and Windows in a Dual-Boot Setup (without Boot Camp)
- Some users prefer to use a third-party boot manager (such as rEFInd) to manage dual-boot configurations, especially if they want more flexibility or customization than Boot Camp offers.
- Steps: Install rEFInd or a similar boot manager to switch between macOS and Windows without Boot Camp, allowing you to select your OS during boot-up.
Which Option Should You Choose?
- For performance and native experience: Go with Boot Camp (dual-boot setup).
- For flexibility and ease of switching between macOS and Windows without rebooting: Use virtualization software like Parallels Desktop or VMware Fusion.
- For occasional use of Windows apps: Consider CrossOver or cloud-based solutions.
- For access to a remote Windows machine: Use Remote Desktop.
Each of these methods offers different advantages, so the best option depends on your use case—whether you need performance, flexibility, or cost-efficiency.
Pros and Cons of Using Boot Camp for Mac with Windows 10
While Boot Camp offers many advantages, there are some pros and cons to consider.
Pros:
- Better Performance: Since Windows runs natively, you get full use of your Mac’s hardware for tasks like gaming, video editing, and development.
- Free Solution: Boot Camp is built into macOS, so there’s no need to pay for third-party software or virtual machines.
- Dual Operating System: You can easily switch between macOS and Windows 10 without having to install separate devices.
Cons:
- No Support for M1/M2 Macs: Boot Camp is only available on Intel-based Macs, so it won’t work on newer Macs with Apple Silicon processors.
- Storage Management: You must partition your Mac’s storage for Windows, which reduces the space available for macOS.
- Manual Setup: The process of installing Windows and managing dual-booting can be complex for beginners, especially if you’re not familiar with partitioning drives.
Alternatives to Boot Camp for Mac
If you don’t want to use Boot Camp, there are some alternatives to consider:
- Parallels Desktop: This virtualization software allows you to run Windows within macOS, without rebooting. It’s perfect for users who need to run Windows applications without sacrificing their macOS experience.
- VMware Fusion: Another virtualization option that works similarly to Parallels, allowing you to run Windows in a virtual machine.
While both of these options allow you to run Windows on your Mac, they don’t offer the same level of performance as Boot Camp, since they share system resources with macOS.
Conclusion
Boot Camp for Mac with Windows 10 is a powerful tool for users who need the best of both operating systems. Whether you’re a gamer, developer, or professional who relies on Windows-specific software, Boot Camp lets you run Windows natively on your Mac with minimal hassle. While the installation process requires some technical steps, the benefits far outweigh the effort for those who need to switch between macOS and Windows regularly.
By following the guide above, you can easily set up Boot Camp and enjoy the full performance of Windows 10 on your Mac. Just remember to back up your data and ensure you have enough storage space for both operating systems, and you’ll be ready to go!


